Cosmic Conservative

Rational Conservatism from the heart of America

Making Miniatures

By CosmicConservative
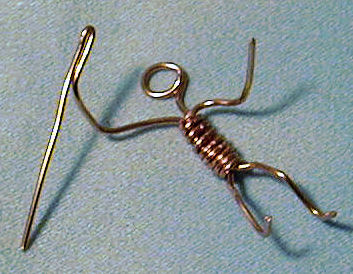
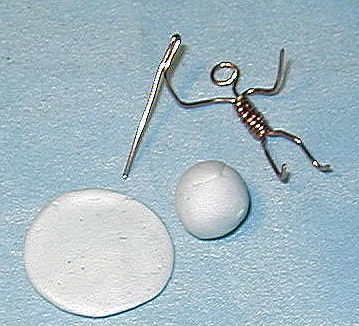
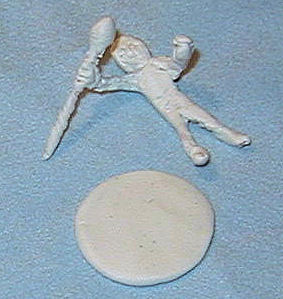
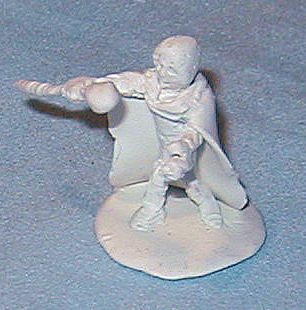
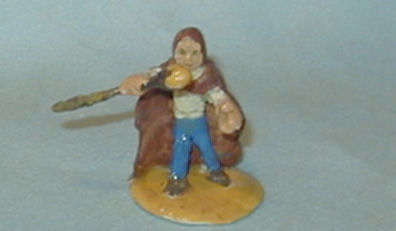
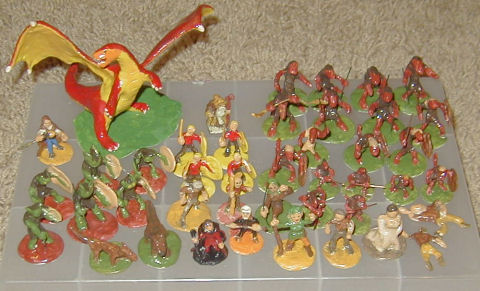
Here is a series of photos (not very good, I'm afraid, I have an old digital camera with no closeup lens) showing me making a mniature character for gameplay. armature.JPG This is the original wire armature. It's just copper wire cut to size with one piece of wire wrapped around three other pieces of wire to hold them together. The "staff" will be made from the wire that extends from the hand area, it's all one piece of wire just bent back on itself. This little trick makes it much easier to create figures holding swords, staffs, wands, spears, etc. sculpey.JPG This is the wire armature, a round flat piece of clay (about the size of a penny) for a base, and a ball of clay that I'll use to coat the armature. armaturecovered.JPG This is just the armature covered in sculpey clay. Very rough. standing.JPG This is the same coated armature, attached to the base (just pushed down onto it is all) with some detail work done and a cloak added to it. It's starting to look like a cleric... painted.JPG And here it is, baked and painted. That's all there is to it. There is some foreshortening of the image, the staff isn't really that big. Miniatures.JPG And here's a bunch of miniatures. Mostly kobolds. I've got some others I didn't show in this picture since members of my D&D group read my blog and I don't want them to see some of the surprises I have for them. The cleric I just made is to the left of the dragon so you can get some idea of the scale. Most of the miniatures are around 1 inch to 1.5 inches in height. Which is sort of bad since they should all be more or less exactly one inch for human figures. The kobolds should be about half that size, and many of them are larger than the human figures. But it's a game of imagination, right? There is one miniature that I bought and painted, the rest I made from scratch. See if you can figure out which one it is. ;) The three front and center (the green-haired female, the black and red wizard and the white-haired wizard) are characters I play in campaigns. The rest are NPCs in campaigns I run. The newborn cleric might be one of my characters too, I haven't decided yet. That's it. Nothing to it really. Not that this is anything to brag about, but there it is. The figure shown here took me about 30 minutes to make and paint, with an additional 15 minutes with it in the oven curing.
Comments (6)

JSullins
I'm filled with envy! The wire looks to be heavier than I was imagining it. Was it expensive? Looking at what you've done, I can recognize that I would not be able to replicate your results. I've always been all thumbs when it comes to seeing an image in my mind and forming it with my hands. The step where you create the figure with wire would be exceedingly difficult for me. Adding the clay would just be an exercise in humility.
CosmicConservative
I am one of those people who is constantly fiddling with things. The wire was purchased long ago for some long-forgotten project I was planning to do. I think it was from when my son was interested in electronics so we bought him a breadboard kit and I bought some extra wire for him to use. I don't think it was expensive and it's not as big as it looks, you can easily bend it with your fingers, but to get it to tightly bend around the other wires, I do use a pair of needle-nose pliers. On its own you would think it was thin wire. I'm only using copper wire because that's what I had. The online miniature making sites all say to use steel wire. I am sure you can buy reams of steel wire very cheaply. I think you are over-thinking this. I started with simple toy-soldier poses, and thought those looked boring so I simply started bending the legs and arms a bit to make it look like a more relaxed pose. Now I'm starting to try to get more dynamic with some poses, and sometimes it works, (I particularly like my kobold shaman pose) but sometimes it just looks like the figure needs to use the bathroom (like the cleric in this thread, which turned out much more awkward than I was hoping). The hard part to me is the face and the hands. The sculpey material I am using is not very firm, so when you try to shape the hands and face, it tends to shred and crumble. That happened last night and I didn't realize it until I cured the figure, but the lower right portion of the face sort of flaked off while curing, and now it looks like the Phantom of the Opera. I tried to cover it up with paint, but it doesn't look good. But as I've said, I'm going for playability in most of these, not style. And I think they are playable for the most part. I'm hoping I learn more as I go and can start to get more natural appearing poses, better faces and hands, then I'll start working on "artistic" things like texture, fabric creases, facial expressions, etc.
CosmicConservative
I've been thinking about how to simplify this process. Currently each miniature I make is a start-from-scratch affair. I need to get some sort of assembly line mentality going. I should probably cut enough wire for a couple dozen figures at one time so that I maintain a consistent size in them. Then I should probably join all the wires together and do the basic poses. Then I should do all the sculpey fillout and put them all aside. Then I could focus on fine detail one at a time, and cure two dozen at once. Although pulling out the paints for two dozen miniatures might be intimidating in itself.... Hmmm.... as Drudge would say, this is developing....
Drax
Much impressed! I was really expecting much less in the final result, based, of course, on what I might be able to do, heh. Good job!
CosmicConservative
The look of these improves greatly with distance. Up close you can see that most of these figures have no faces, and no hands. I've only recently started adding faces and hands, and that is creating its own problems. But thanks for the kind words.
» Making stuff… CosmicConservative: Rational Conservatism from the Rocky Mountains
[...] Of course, I’ve commented on this before, the last time I had a compulsion, which was to make my own miniatures, as shown in this post: [...]