OK, I have always admired folks who can perform electronic wizardry with wires, circuit boards, simple tools and soldering irons. And I mean "wizardry" because to me it is magic what they can do by clipping a few leads, rerouting the signals through some off-the-shelf integrated circuit that they found in a NASA garbage bin, and turning a standard telephone into a universal remote control device, or other such things.
I have never been one of those wizards. Oh, I've done my share of circuit board work during my years as an engineering student or physics student, and I understand the basics of electronics, and have wielded a few soldering irons over my lifetime, but I've never really been one to take apart some fancy electronic device and repurpose it for some entirely separate function.
Until now, that is. Or now I'm trying to. This goes back to that computerized game board I wanted to create. And since I don't want to pay Bill Gates $10,000 for one, I started trying to figure out if I could just make one myself.
Now, making a game board which allows me to have the top of a gaming table essentially become a second external display for a laptop computer requires a lot of different skills. Besides the basic "how to make a table" skills, it also involves designing optical elements, and somehow getting a screen image that can be magnified to the proper size for the use as a gaming table.
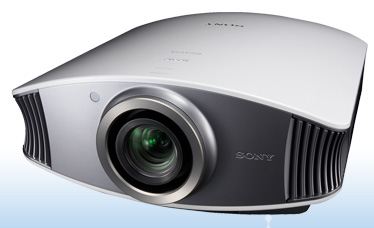
The most logical way to pursue this is to buy something that can create a bright virtual image of a computer screen and simply direct that so that it is focused on a table top. And of course the logical "something" for that purpose is a computer projector that allows you to set it up as a second screen. Which is what I've seen others do, but still requires building a mount or platform to hold the projector.
The obvious approach is to simply point the projector at the table and bingo! problem solved!
Except for a few issues.
1. Projectors are more expensive than laptops, desktops, external monitors or all three combined. A typical business-type computer projector costs in the neighborhood of $750 - $1,500. Which was way more (by about $750 - $1,500) than I wanted to spend.
2. Projectors are meant to sit on a table or be mounted on a wall or ceiling. They are not generally attached to a table, and there are no commercial products I know of that allow you to project the image down to a table. So even if you use a projector, you still need to build a custom mount for it, which usually involves a seven foot tall tower to hold the projector high enough that it can display an appropriately sized image.
3. Projecting the image downward creates an image-forming cone that creates shadows whenever someone reaches over the board or leans in to see something closely.
4. Replacement projector bulbs are very expensive, typically costing in the $350 - $500 range. Which is in many cases more than half the cost of the projector itself. And constantly moving a projector around tends to reduce the life of a projector bulb.
So, of those issues, clearly issue #1 was the biggy. So I started figuring out how to get around that problem (the "OMIGOD HOW MUCH DOES A PROJECTOR COST!?!!?" issue). And it turns out that I am not remotely the first person to react that way. In fact projectors are about 1/5 the cost that they used to be. I once purchased a VGA computer projector for work purposes (using work money, not my own) and it cost $3,500 about six years ago.
Since people have been unwilling to pay such a high cost for projectors there actually used to be a thriving "Do It Yourself" community who built projectors out of discarded or obsolete LCD computer monitors. LCD computer monitors can be had on eBay or CraigsList for as little as $20. So I looked at a $20 investment in a used LCD display and compared that to $1,000 for a projector and decided that it was time I entered the highly rewarding world of Do It Yourself Electronic Hacking....
So I did, in fact, procure an old, but fully functional, 14.1 inch LCD monitor from Ebay for $20 (plus $14 shipping, I'm afraid). Next I needed a light source, and the DIY forums recommended buying a used overhead projector, so I did. That I found locally for $20.
Then I started working out a design to project the image. Plus I decided that it was better to project the image UPWARD from under the table instead of from above to avoid the whole shadow effect issue. So I started to work out designs.
That led me to looking at a projector lens that would project the image and keep it in focus over the playing area. I finally settled on a surplus copy machine lens that I got for less than $10 from a mail order company called
Surplus Shed. They have very reasonable shipping so it cost me $15.
"There," I thought, "now I have all the components I need, now it's just a matter of putting it all toghether. So I began prototyping the device so that I could validate my design.
And it turns out that there are "complications" to this thing that I did not anticipate.
First there was the whole "illumination of the LCD screen" issue. It turns out my LCD screen was about an inch wider than the overhead projector, so I could not just lay the screen on the OP and get the full screen to display. I agonized over this for a long time and finally decided that I wanted to have the full 1024x768 pixels so that I could project a perfect 24x32" play area with each square having 32x32 pixels. that was detailed enough to draw recognizable walls, floors, trees, etc. Using less than the full screen introduced both a smaller play area, and some logistical problems of how to keep the play area "in play" so to speak since an inch of the screen would not be visible to the user to manipulate windows, controls or objects within windows.
Just as I was deciding to do that, my prototype work demonstrated another unexpected problem. It turns out that overhead projectors are designed to project their image through lenses located roughly 18" above the surface of the light source. But I needed the lens to be located about 8" above the light source. When I put the lens there, a large part of the light cone from the LCD screen would be lost, resulting in both a generally dimmer image, and portions of the LCD being completely unreadable on the play area. That's because the OP uses Fresnel lenses to focus the light into the OP's lenses. The only way to deal with that was to change the focal length of the Fresnel lenses. Well, in order to display the full size of the LCD I already knew I needed new Fresnel lenses, so the two of these issues together convinced me to purchase a set of lenses which cost $17.50 each. Plus shipping (another $7).
I also realized that the optical path for magnifying the image to the appropriate size was long enough (just barely) that I was going to have to have the overhead projector mounted sideways, and then "bounce" the image off a 45 degree mirror in order to get it to the table. Of course that requires a front-surface mirror since a "normal" mirror is silvered on the BACK and that results in a ghost image from the front of the glass. So back to SurplusShed, and another $10 (no shipping, I managed to get them to add it to my existing copy lens order).
OK, for my prototype instead of taking the LCD apart to use just the screen part of it, I had been using a piece of overhead projector plastic paper and drawing on it. Now that I had the lens and fresnel lenses that I required, it was time to take apart the LCD device, remove the backlight assembly and mount the now transparent LCD in front of the Fresnel lens.
Now I admit that I had put this off because I am not the world's most talented person when it comes to using tools. I've done more damage to things that I am trying to fix than I would really like to admit. And taking apart an LCD screen to get to the actual LCD inside is a very delicate process, something I knew because I once had to replace the screen in my wife's laptop.
But it had to be done, so last weekend I took apart the LCD device so I could turn it into the image that would be projected. And that's when I discovered that the LCD itself had a circuit board mounted on it that sat right in front of the screen, with two incredibly short connectors at right angles to each other that kept me from being able to flip the circuit board out of the way. So all week long I've been trying to figure out how to splice one of the connectors so that I could make a longer "cable" and then flip the board out of the way. Since the connector I am talking about is less than a quarter of an inch wide and has ten conductors that connect the LCD to the board, that meant I was faced with attempting to splice a cable with wires that are less than .025 inches apart. The wires I purchased cost me $3.00 at Radio Shack and last night I attempted (for four hours) to splice the connector.
It was a dismal failure. In fact I think it might be virtually impossible to do since the cable is not made of wire, it is a piece of plastic with "wires" drawn on it. There's no way to separate them and attach them to each wire separately. Or no way that would not almost certainly end up with destroying the cable.
However, when I bought the wire, the Radio Shack employee who sold it to me was curious about what I would be using such tiny wire for, (perhaps he thought I might be building a bomb) and when I explained it to him, he pretty much said that it would be impossible to splice the cable with wires period.
HOWEVER! He said that they used to sell (for $5.00) a product called "CircuitWriter" which is essentially a ballpoint pen that draws conductive ink. Too bad they didn't sell them anymore.
But Amazon.com does. For $18.50. Plus shipping. Of $10...
But of course I bought it and it will be delivered sometime next week. The thought is that with a pen that I can draw a "wire" with, splicing the cable becomes much, much easier, and any mistakes I make can be erased and redrawn without having to cut and strip any wires. SWEET!
(Incidentally, it can also be used to repair a broken windshield de-icer element, which is the justification I will use when the Cosmic Wife finds out about this.) ;) It's TRUE, I swear it is! My Pathfinder has a broken connection on one of the de-icer elements that keeps my rear window from de-icing. This is TOTALLY a necessary purchase simply for the sake of automotive safety!
So that's where I am now, and I haven't even begun to build the table and the "box" that will hold all the projector elements. However, I do have a pile of usable lumber that looks like it will work fine for the "box", but not for the table. To finish this I need to either buy and modify a table or else build one from scratch. I am leaning towards "from scratch" but that's a fairly big work effort all itself. However, that does not add to the incremental expense of the table since I would need to do that no matter how I was building the table. But it's going to cost at least $50 for the materials I need to make the table. I'll use as much existing wood that I have in my garage as I can, but at the very least I have to purchase the plexiglas that will provide the play area itself, and that's going to be close to another $50 or so.
So my "DIY" project is going to end up costing me about $200, which is still a whole lot less than it would have for a projector-based one, but is about $150 more than I had initially hoped it would cost.
I'll keep you posted on the development. I should have it done by the time I retire in 2025 or so. Which will be great because then I'll have the time to actually USE it.
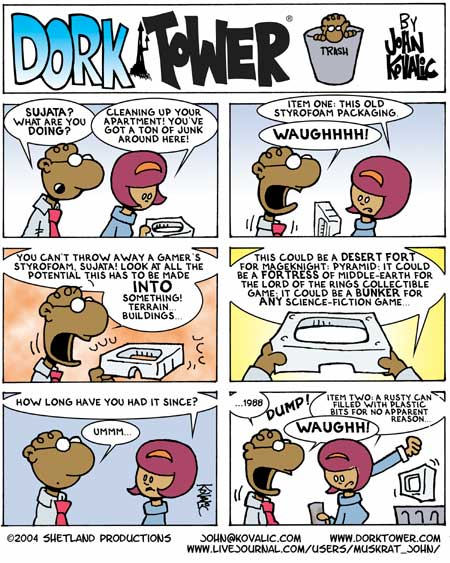 Why post this? Um... because we had a bunch of styrofoam from some boxes for Christmas and I wanted to keep it to carve into D&D structures. I even laid out some basic castle sections before the Cosmic Wife swept it all into a trash bag...
Nobody understands us gamers...
Oh, this was one of the strips too, it's a bit dated, but I still thought it was funny...